When it comes time to create an OData project, there are a few things you’ll need to do. First, however, make sure you’ve created all the required core data services (CDS) views.
Assuming you’ve done that, here’s how to create an OData service, as well as exposing CDS views as a service.
Creating the OData Project
For this, go to Transaction SEGW, click on the Create Project icon, and name the OData project (in this case, we’re naming it “Z_PurchDocsOVP”).
Now we need to add our CDS views into the OData project:
- Expand the OData project tree structure.
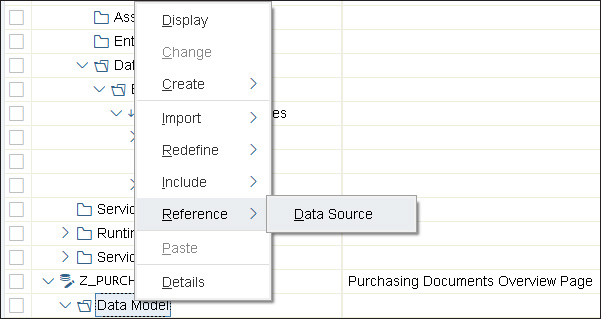
- Right-click on Data Model, and choose Reference _ Data Source (as shown in the first figure).
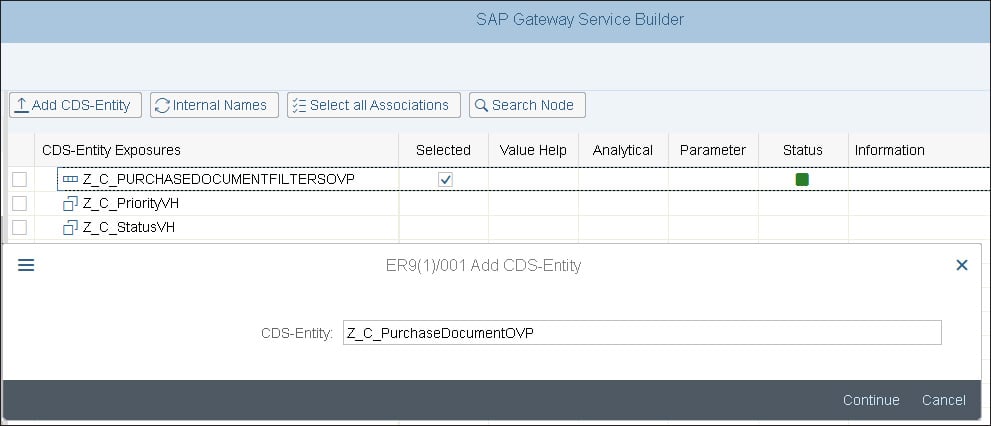
- Add our first CDS view for the filter bar Z_C_PurchaseDocumentFiltersOVP.
- Click Next and then click Finish to add the CDS view to the project.

Adding Overview Page Card CDS Views into the Project
With the OData project created, now it’s time to add our CDS views for the OVP cards into the project. To do so, click on the Add CDS-Entity button at the top of the screen, and add the remaining CDS views one by one as shown in the following figure.

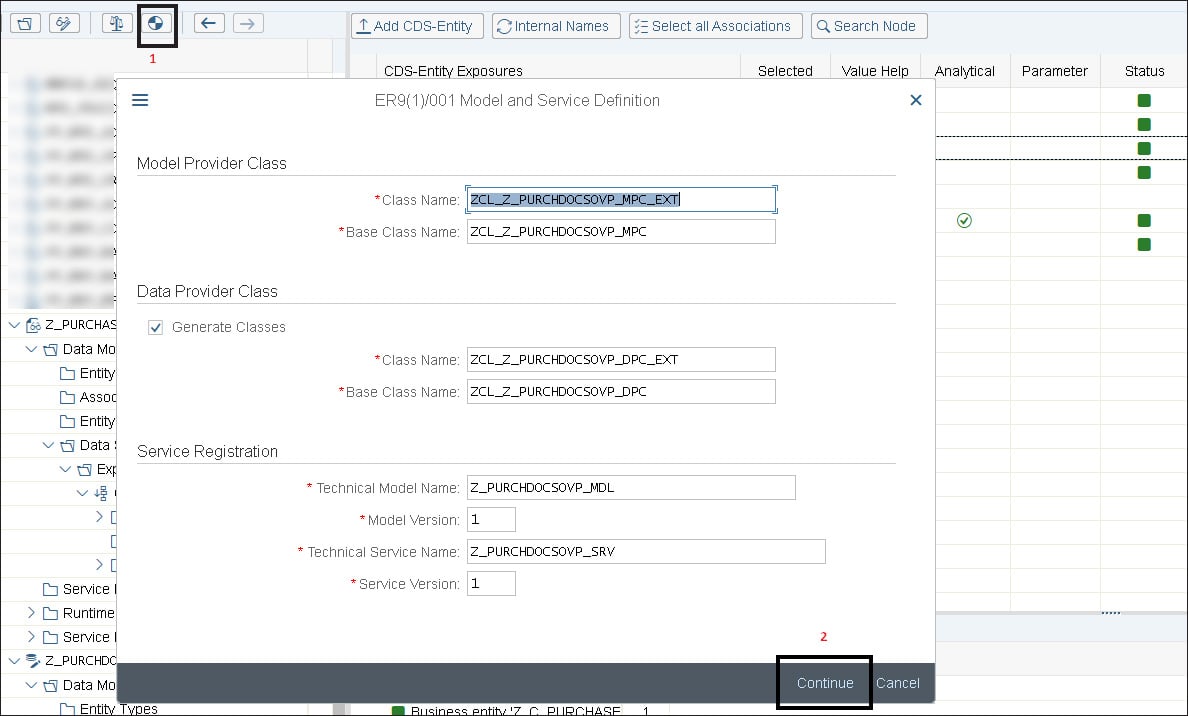
Now click on the Generate icon on the toolbar, and click on Continue in the popup window, as shown in the next figure.

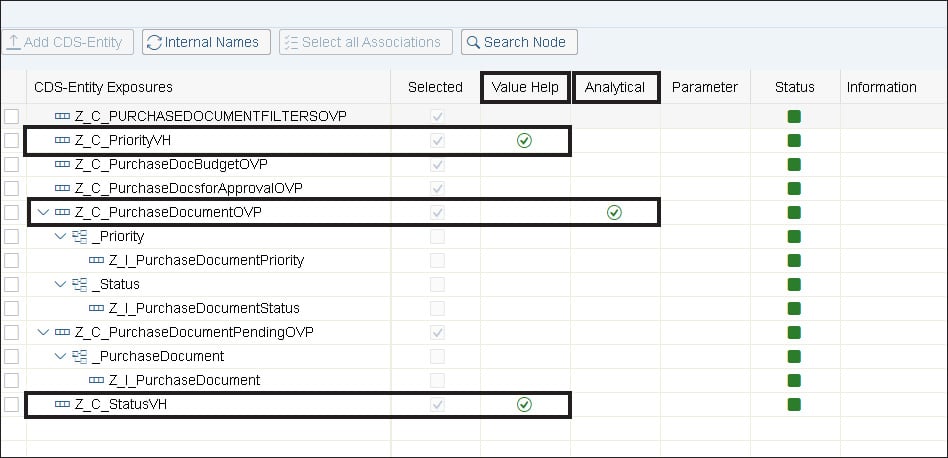
On the next popup window, you can either save it into your package or as a local object (in this case, we save it as a local object). After you’ve generated the project, you’ll notice a few green checkmarks against the three CDS views in the project.

You’ll notice that two of them are checked against Z_C_PriorityVH and Z_C_StatusVH—this is because the programmer added value helps in the code, allowing filtering. The framework automatically detected these views as value helps and marked them. The third CDS view with the checkmark is for Z_C_PurchaseDocumentOVP because the metadata extensions for the CDS view contain analytical annotations for the charts.
After the OData project is generated, we need to register the OData service so that we can use it in SAP Web IDE to generate the OVP application.
Importing the OData Service
Execute Transaction /n/IWFND/MAINT_SERVICE on the SAP Gateway hub system. Click on the Add Service button, as shown in the figure below.

Registering the OData Service
In the next screen shown in the final figure, enter the System Alias as “Local” because your OData project is being registered on the same system. If you want to register the service in another SAP Gateway system, then enter the respective system alias. Enter the project name “Z_PURCHDOCSOVP*” or the name you’ve given for your project into the External Service Name field and press (Enter).
You should see your OData service ending with _SRV. Select the checkbox next to the service name, and click the Add Selected Services button. Click Continue on the popup window and the subsequent pop ups asking for confirmation.

Conclusion
Knowing how to create an OData service is an important step in ABAP development. So is exposing it—and once you’ve exposed a CDS view via the OData service, you can start front-end application using the SAP Web IDE.
Editor’s note: This content was originally posted on the SAP PRESS Blog and has been adapted from a section of the book ABAP Development for SAP S/4HANA: ABAP Programming Model for SAP Fiori by Stefan Haas and Bince Mathew. Used with permission of SAP PRESS. All rights reserved.

Comments